Tinymce富文本编辑器实现粘贴Word图片
前言
项目里需要使用富文本编辑器,因为历史原因用到的是tinymce,期间遇到一些问题,所以此文记录一下实现的效果和期间遇到的一些问题。
一、技术栈
react18 + tinymce6.3.0/tinymce5.10.9 + tinymce-react4.3.2 + javascript + @monaco-editor/react4.6.0
二、实现效果
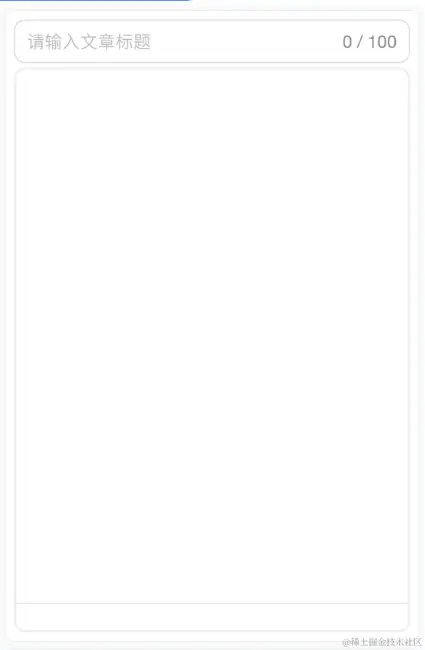
1、粘贴的内容清除标签的属性并将换行的内容换成通过P标签包裹;
2、实现粘贴Word / WPS的图片;
3、将粘贴的图片(包含word粘贴和直接截图粘贴)改为loading实现上传到本地服务器再回显;
4、增加自定义菜单栏,上传图片、视频、源码等;
三、实现逻辑及代码
使用的是tinymce-react封装好的组件,所以需要安装组件库和tinymce。
1、安装@tinymce/tinymce-react及将tinymce下载放到自己的文件夹或者服务器上或通过CDN访问。
import { Editor } from '@tinymce/tinymce-react'
const TinymceEditor:FC = () => {
     const [editorIns, setEditorIns] = useState(null)
    return tinymceScriptSrc={'xxxx'+'tinymce/tinymce.min.js'}//放tinymce的路径
         // tinymceScriptSrc={"https://cdnjs.cloudflare.com/ajax/libs/tinymce/6.7.0/tinymce.min.js"}
              onInit={(event,editor) => {
            setEditorIns(editor)
              }}
               plugins:[]
               toolbar:''
               ......
            />
}
2、实现将粘贴的内容清除标签的属性并将换行的内容换成通过P标签包裹:
实现对粘贴的内容做处理,这里是监听富文本编辑器的PastePreProcess事件:
const excludeTags = ['img', 'video', 'audio', 'source', 'track', 'iframe', 'embed', 'object', 'param', 'script', 'style',
'link',
]
// 去除 除了excludeTags中 的其他标签的属性。
export const removeAllAttributes = (htmlString: string) => {
const parser = new DOMParser()
const doc = parser.parseFromString(htmlString, 'text/html')
//通过递归的方式将标签中除了src或者a标签的href属性都清除
const innerFn = (node: HTMLElement) => {
if (node.nodeType === 1 && !excludeTags.includes(node.tagName.toLowerCase())) {
const attributes = node.attributes
for (let i = attributes.length - 1
if (attributes[i].name === "src" || (node.nodeName !== "A" && attributes[i].name === "href")) continue
node.removeAttribute(attributes[i].name)
}
for (let i = 0
innerFn(node.childNodes[i] as HTMLElement)
}
}
}
innerFn(doc.body)
return doc.body.innerHTML
}
// 提取所有换行的内容文本,将其通过 p 标签包裹。
export const clearAllTagsInP = (htmlString: string): string => {
const pElement = document.createElement('p')
pElement.innerHTML = htmlString
if (htmlString === pElement.innerText) {
//如果粘贴的是纯文本就不做处理
return htmlString
}
//具有换行样式的标签(不全)
const formatArr = ['', ''
, '' , ''
, ''
, ''
, ''
, ''
, ''
, '
',
// ''
]
let arr: string[] = []
// 根据带换行样式的标签,将粘贴的文本分离为一个数组
for (let i = 0
if (i === 0) {
arr = htmlString.split(formatArr[i]).filter(item => Boolean(item))
} else {
arr = arr.map(item => item.split(formatArr[i])).flat().filter(item => Boolean(item))
}
}
const divElement = document.createElement('div')
for (let i = 0
// 过滤掉所有标签(除了img video audio 标签),提取出内容文本。
arr[i] = arr[i].replace(/<(?!/?(img|video|audio)b)[^<>]+>/g, '')
if (arr[i]) {
const pElement = document.createElement('p')
pElement.innerHTML = arr[i].trim()
divElement.appendChild(pElement)
}
}
return divElement.innerHTML
}
const cleanWordPaste = (content:string) => {
let result = content
result = removeAllAttributes(result)
result = clearAllTagsInP(result)
}
useEffect(() =>{
if(editorIns){
editorIns.on('PastePreProcess',async (event:any) => {
e.preventDefault()
})
const {content} = event
let newContent = cleanWordPaste(content) // 粘贴格式处理
}
},[editorIns])
通过以上的处理,我们就得到了移除了不必要属性和标签,相对简单的粘贴内容。
3、实现粘贴Word的图片
我们粘贴word或wps中的图片到富文本编辑器里会发现图片的路径是以file://开头,并且会出现不能加载的报错:

但是经过测试在手机端(iOS16的safari)可以直接粘贴word中的图片,因为图片被转为了blob。但是对于pc端
发现tinymce不能粘贴word的图片,在网上搜索到一位大佬的文章,查看ckeditor源码发现可以通过获取粘贴内容的rtf格式(富文本格式(Rich Text Format)),然后以图片的正则格式去匹配再转变为base64。
那如何将粘贴的内容转为rtf格式的内容呢?
const clipdata = e.clipboardData || window.Clipboard
let rtf = clipdata?.getData('text/rtf')
可以看到需要获取到粘贴事件的剪贴板内容,但是呢tinymce的paste_preprocess没有将剪贴板对象返回,所以需要我们魔改paste的源码。具体的修改可以查看:项目中develop分支的commit。
在魔改完paste的源码后,我们来处理如何将file本地路径图片转为blob:
//将匹配的图片Hex内容转为base64
const _convertHexToBase64 = (hexString: string) => {
return btoa((hexString.match(/w{2}/g)!).map(char => {
return String.fromCharCode(parseInt(char, 16))
}).join(''))
}
//将base64转换为文件对象
const convertBase64ToBlob = (base64: string) => {
const base64Arr = base64.split(',')
let imgtype = ''
let base64String = ''
if (base64Arr.length > 1) {
//如果是图片base64,去掉头信息
base64String = base64Arr[1]
imgtype = base64Arr[0].substring(base64Arr[0].indexOf(':') + 1, base64Arr[0].indexOf(';'))
}
// 将base64解码
var bytes = atob(base64String)
//var bytes = base64
var bytesCode = new ArrayBuffer(bytes.length)
// 转换为类型化数组
var byteArray = new Uint8Array(bytesCode)
// 将base64转换为ascii码
for (var i = 0
byteArray[i] = bytes.charCodeAt(i)
}
// 生成Blob对象(文件对象)
return new Blob([bytesCode], {type: imgtype})
}
// 处理file本地路径图片转为blob
const convertFileToBlob = (content: string, e: any) => {
if (!e) {
return content
}
try {
const parser = new DOMParser()
const doc = parser.parseFromString(content, 'text/html')
const imgs = doc.querySelectorAll('img')
const clipdata = e.clipboardData || window.Clipboard
let rtf = clipdata?.getData('text/rtf')
for (let i = 0
const img = imgs[i]
const src = img.getAttribute('src')
if (src && src.startsWith('file:')) {
try {
const regexPictureHeader = /{pict[sS]+?({*blipuids?[da-fA-F]+)[s}]*/
const regexPicture = new RegExp('(?:(' + regexPictureHeader.source + '))([da-fA-Fs]+)}', '')
// 不采用全局匹配:这里与大佬的文章不一样,做了一下改造,是因为如果某张图片太大报错后会导致所有的图片都不能做处理,所以采用遍历匹配的方式处理会报错前的图片
// 使用递归:匹配到的不一定有imageType,有imageType的才是需要的
const getImagesHexSource = (): any => {
const imageMatch = rtf?.match(regexPicture)
const image = imageMatch[0]
if (!rtf || imageMatch.index < 0) {
img.setAttribute('src', '')
img.setAttribute('alt', '图片加载失败')
return
}
rtf = rtf?.slice(imageMatch.index + image?.length)
let imageType = ''
if (image.includes('pngblip')) {
imageType = 'image/png'
} else if (image.includes('jpegblip')) {
imageType = 'image/jpeg'
}
if (imageType) {
return {
hex: image.replace(regexPictureHeader, '').replace(/[^da-fA-F]/g, ''),
type: imageType
}
} else {
return getImagesHexSource()
}
}
const imagesHexSource = getImagesHexSource()
if (imagesHexSource) {
const newSrc = `data:${imagesHexSource.type}
let boldFile = convertBase64ToBlob(newSrc)
img.setAttribute('src', URL.createObjectURL(boldFile))
}
} catch (e) {
img.setAttribute('src', '')
img.setAttribute('alt', '图片加载失败')
}
}
}
return doc.body.innerHTML
} catch (e) {
return content
}
}
useEffect(() =>{
if(editorIns){
editorIns.on('PastePreProcess',async (event:any) => {
e.preventDefault();
})
const {content} = event;
let newContent = cleanWordPaste(content);
newContent = convertFileToBlob(newContent, __event);
}
},[editorIns])
到这里,我们就实现了粘贴word中的图片。
4、将粘贴的图片改为loading实现上传到本地服务器再回显
对于粘贴的图片因为是blob的格式,需要将它们上传到服务器再进行替换回显,这样子才可以在发布后,别人也可以访问到。
const convertImgToLoading = (content: string) => {
const parser = new DOMParser();
const doc = parser.parseFromString(content, 'text/html');
const imgs = doc.querySelectorAll('img');
for (let i = 0; i < imgs.length; i++) {
const img = imgs[i];
const src = img.getAttribute('src');
if (src && ((src.startsWith('http') && !src.startsWith('自己图片服务器域名')) || src.startsWith('blob:') || src.startsWith('file:'))) {
img.setAttribute('src', loadingGif);
img.setAttribute('data-paste', `paste${i}`);
img.setAttribute('width', '48px')
img.setAttribute('height', '48px')
}
}
return doc.body.innerHTML;
}
type imgListProp = {
key: string;
url: string;
width?: string | null;
height?: string | null;
error?: boolean;
}
const getLocalNetworkImg = async (content: string, callBack: Function) => {
const parser = new DOMParser();
const doc = parser.parseFromString(content, 'text/html');
const imgs = doc.querySelectorAll('img');
let result: imgListProp[] = [];
let lastCallback = false;
for (let i = 0; i < imgs.length; i++) {
const img = imgs[i];
const src = img.getAttribute('src');
if (src && ((src.startsWith('http') && !src.startsWith('自己图片服务器域名') || src.startsWith('blob:'))) {
try {
const fileResData = await axios.get(src, {responseType: 'blob'});
const fileName = Math.random().toString(36).substring(2) + '' + Date.now() + '.' + fileResData?.data?.type?.substring(fileResData.data.type.lastIndexOf('/') + 1) || 'jpg'
const fileData = new File([fileResData.data], fileName, {type: fileResData.data.type});
const {url} = await uploadFileToServe(fileData);
result.push({
width: img.getAttribute('width'),//避免loading宽高覆盖原有图片宽高
height: img.getAttribute('height'),
url,
key: `paste${i}`
})
} catch (err) {
if (src.startsWith('http') && !src.startsWith('自己服务器地址')) {
try {
const data = await getUrlByUrlUpload(src);
result.push({
url: data,
key: `paste${i}`,
width: img.getAttribute('width'),
height: img.getAttribute('height'),
})
} catch {
result.push({
url: '',
key: `paste${i}`,
error: true,
width: img.getAttribute('width'),
height: img.getAttribute('height'),
})
}
} else {
result.push({
url: '',
key: `paste${i}`,
error: true,
width: img.getAttribute('width'),
height: img.getAttribute('height'),
})
}
}
}
if (result.length && result.length % 3 === 0) {
lastCallback = false;
callBack && callBack(result)
} else if (result.length) {
lastCallback = true;
}
}
if (lastCallback) {
callBack && callBack(result)
}
return result;
}
//将上传后的图片替换掉loading
const convertLoadingToLocal = (content: string, imgList: imgListProp[]) => {
const parser = new DOMParser();
const doc = parser.parseFromString(content, 'text/html');
const imgs = doc.querySelectorAll('img');
for (let i = 0; i < imgs.length; i++) {
const img = imgs[i];
const dataPaste = img.getAttribute('data-paste');
const findItem = imgList.find(item => item.key === dataPaste)
if (findItem) {
const {url, width, height, error} = findItem
removeAllAttr(img) // 清除所有属性,避免安全问题
if (url) {
img.setAttribute('src', url);
img.removeAttribute('data-paste')
} else {
// 改为三个改一次后 三个后面的都会走这里,所以加多error字段去判断转为本地失败的情况
// img.setAttribute('src', url);
// img.setAttribute('alt', '图片加载失败')
}
if (error) {
img.setAttribute('src', url);
img.setAttribute('alt', '图片加载失败')
}
if (width) {
img.setAttribute('width', width);
} else {
// 截图粘贴的图片本来没有宽高属性,所以需要去掉loading的宽高
img.removeAttribute('width');
}
if (height) {
// img.setAttribute('height', height); // 富文本最终发布时,width 始终为 100%,不限制高度。
img.removeAttribute('height');
} else {
img.removeAttribute('height');
}
img.setAttribute('data-copyright', '非原创图片')
}
}
return doc.body.innerHTML;
}
目前监听PastePreProcess的代码如下:
useEffect(() => {
if (editorIns) {
editorIns.on('PastePreProcess', async (e: any) => {
e.preventDefault();
const { content, __event } = e
let newContent = cleanWordPaste(content)
newContent = convertFileToBlob(newContent, __event)
const loadingContent = convertImgToLoading(newContent)
editor.insertContent(loadingContent)
getLocalNetworkImg(newContent/*需要注意,这里获取的是加loading前的内容*/, (imgList: imgListProp[]) => {
const finalContent = convertLoadingToLocal(
editor.getContent(),
imgList
)
onChange && onChange(finalContent)
})
})
}
}, [editorIns])
至此,已经实现了在tinymce富文本编辑器中粘贴图片,并上传到本地服务器回显。
四、其他功能
1、自定义工具栏按钮
我们可以在组件的init属性中配置setup方法里添加自定义的工具按钮,然后在toolbar属性中增加自定义工具的名称,比如自定义插入图片:
{
editor.ui.registry.addButton('customImage', {
// text: '插入图片',
icon: 'image',
onAction: () => {
}
})
},
toolbar:'customImage'
}}
/>
2、插入源码
这里插入源码是自定义一个工具栏按钮,然后通过弹窗包裹@monaco-editor/react组件。实现如下:
首先自定义一个插入源码的工具栏按钮:
init={{
setup:editor => {
editor.ui.registry.addButton('autoCode', {
tooltip: '插入源代码',
icon: 'sourcecode',
onAction: () => {
let newContent = editor
.getContent({ format: 'raw' })
.replace(/
data-mce-bogus="1">
/g, '
')
if (newContent === '
') {
// 当富文本编辑器为空时,editor.getContent({ format: 'raw' })会获取到
data-mce-bogus="1">
newContent = ''
}
setShowSourceCode(d => ({
content:newContent,
visible: true
}))
}
})
},
toolbar:'customImage'
}}
/>
这里使用antd design的Modal:
width={1000}
title={'源代码'}
open={showSourceCode.visible}
destroyOnClose
okText="保存"
onCancel={() => {
setShowSourceCode(d => ({ content: '', visible: false }))
}}
onOk={() => {
const newContent = removeAllClassAttr(monacoRef.current.getValue())
onChange && onChange(newContent)
setShowSourceCode(d => ({ content: '', visible: false }))
}}
>
style={{ width: '100%', height: '80vh', position: 'relative' }}>
width="100%"
height={'80vh'}
options={{
wordWrap: 'on',
formatOnPaste: true, // 粘贴时格式化
formatOnType: true,
minimap: {
enabled: false
},
fontSize: 16
// contextmenu:false
}}
value={showSourceCode.content}
theme={'vs-dark'}
language="html"
onChange={value => {
}}
onMount={(editor, monaco) => {
monacoRef.current = editor
setTimeout(() => {
// 有时会不生效,所以加个定时器(估计是内容获取在组件挂载后)
monacoRef.current.getAction('editor.action.formatDocument').run()
},100)
monacoRef.current.onDidPaste((e: any) => {
//粘贴源码时格式化代码
monacoRef.current.getAction('editor.action.formatDocument').run()
})
}}
>
以上就是在编辑器中插入源码的代码逻辑,MonacoEditor组件有很多配置属性,有空需要去了解了解。
五、遇到的问题
1、tinymce版本问题
在功能上线后发现tinymce7版本在火狐浏览器中打开错误,然后采取降版本的方法改为了v6.3.0,但是v6.3.0在iOS的微信浏览器中打开只有边框,经过测试发现v5.10.9可以在iOS的微信浏览器中使用,所以采用两个版本的方式:对于iOS的微信浏览器使用v5.10.9,对于非iOS的微信浏览器使用v6.3.0:

export function isIOS() {
return /iphone|ipad|ipod/.test(navigator.userAgent.toLowerCase())
}
export function isWechat() {
const ua = navigator.userAgent.toLowerCase()
return ua.includes('micromessenger')
}
<Editor
tinymceScriptSrc={
isIOS() && isWechat()
? import.meta.env['VITE_BASE'] + 'plugins/tinymce5.10.9/tinymce.min.js'
: import.meta.env['VITE_BASE'] + 'plugins/tinymce/tinymce.min.js'
}
init={{
plugins:[ isIOS() && isWechat()?'paste':'',]
}}
>Editor>
需要注意的是,对于v5.10.9需要配置paste插件,不然监听不到pastePreProcess事件。同时,在官网中下载的tinymce的plugins文件夹中没有paste插件,可以直接浏览器访问https://cdnjs.cloudflare.com/ajax/libs/tinymce/5.10.9/plugins/paste/plugin.min.js,把压缩的代码复制放到tinymce目录里。
2、粘贴word遇到的问题
1)在上面实现逻辑及代码有提到如果在粘贴word中某张图片太大,然后去匹配RTF内容会报错【Maximum call stack size exceeded】,所以我采取的方案是递归去遍历匹配,就是如果大图片是后面或者中间,至少前面的图片可以正常显示。
2)发现如果word的内容包含标题,会获取不到RTF内容,这个暂时没有找到解决的方法,因为上线后也没有收到反馈,所以就暂时不解决了,如果非要粘贴可沟通直接在富文本编辑器中填入标题。
3、全选编辑器后粘贴内容
对于编辑器的粘贴内容,我们是监听PastePreProcess事件,并在处理完后更新到富文本编辑器,因为在粘贴的时候,此时的富文本编辑器如果有选中内容,所以我们需要做出判断:
- 没有选中内容:插入处理后的粘贴内容
- 有选中内容:用处理后的粘贴内容替换当前选中的内容
首先我们要判断当前编辑器是否有选中的内容:
const selectionContent = editor.selection
.getContent({ format: 'html' })
.trim()
判断后做处理:
if (selectionContent) {
editor.selection.setContent(loadingContent)
} else {
editor.insertContent(loadingContent)
}
3、移动端中源码编辑器问题
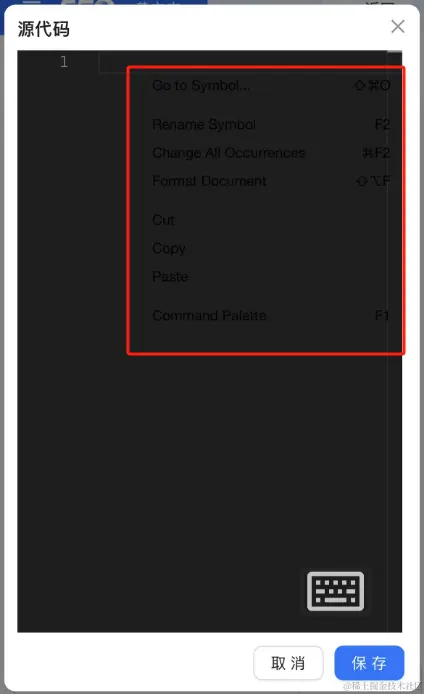
在移动端中打开@monaco-editor/react源码编辑器,需要粘贴内容的时候,发现上下文菜单没有出来,原来是我们使用的主题是vs-dark,但是上下文菜单的背景也是黑色,所以就以为没有出来,那我们就可以改变一下他的背景色和颜色:

:global {
.monaco-menu-container {
background-color: #f1f1f1 !important;
color: #333 !important;
position: absolute !important;
left: 50px !important;//搞成50px是因为在iOS的微信浏览器中会为负值
}
.monaco-menu .action-item {
background-color: #f1f1f1 !important;
color: #333 !important;
}
}
六、参考文章
阅读全文
1、本站所有资源均从互联网上收集整理而来,仅供学习交流之用,因此不包含技术服务请大家谅解!
2、本站不提供任何实质性的付费和支付资源,所有需要积分下载的资源均为网站运营赞助费用或者线下劳务费用!
3、本站所有资源仅用于学习及研究使用,您必须在下载后的24小时内删除所下载资源,切勿用于商业用途,否则由此引发的法律纠纷及连带责任本站和发布者概不承担!
4、本站站内提供的所有可下载资源,本站保证未做任何负面改动(不包含修复bug和完善功能等正面优化或二次开发),但本站不保证资源的准确性、安全性和完整性,用户下载后自行斟酌,我们以交流学习为目的,并不是所有的源码都100%无错或无bug!如有链接无法下载、失效或广告,请联系客服处理!
5、本站资源除标明原创外均来自网络整理,版权归原作者或本站特约原创作者所有,如侵犯到您的合法权益,请立即告知本站,本站将及时予与删除并致以最深的歉意!
6、如果您也有好的资源或教程,您可以投稿发布,成功分享后有站币奖励和额外收入!
7、如果您喜欢该资源,请支持官方正版资源,以得到更好的正版服务!
8、请您认真阅读上述内容,注册本站用户或下载本站资源即您同意上述内容!
原文链接:https://www.shuli.cc/?p=20875,转载请注明出处。


评论0